Sunday, December 30, 2012

A different use for extra ripe bananas: Oven Dried Bananas


Visit my new blog, Scratchy Mama!

Bananas are a regular purchase during our weekly grocery shopping trip. However, for us the window of opportunity for eating them is very short, so we end up with too many that weren't chosen and have now become too ripe for our taste. I usually do one of two things - make banana bread with them or freeze them for another use later (usually banana bread). Although I love banana bread, especially the recipe I posted two summers ago, I wanted to try something a little healthier. The recipe only uses one stick of butter which isn't bad when you eat 1/16 of the loaf like most recipes say is the serving size. But when you're like me, one serving is about 1/8 of the loaf and I usually eat a couple servings a day. Did I really say "only one stick of butter"? I might have a problem... Anyway, here is recipe for dried bananas that is exactly what it sounds like - just dried bananas. No sugar added. Much better for you than those sugary banana chips you can buy at the grocery store. The only thing that is helpful to add is lemon juice, just a light brushing over the tops to help prevent the bananas from turning too brown. 

Next time you have bananas that are a little too ripe, try drying them. I'm planning to make more tomorrow!


Oven Dried Bananas
*Update: I had said you need to brush the slices with lemon juice, but I discovered it doesn't make a difference whether you do or not! Also, if you want your bananas crunchier, leave them in for 4-5 hours.

Ingredient: Ripe bananas that are firm enough to slice

Preheat oven to the lowest temperature possible, mine was about 170-180 degrees F. Slice bananas no more than 1/4 inch thick. On a baking sheet lined with parchment paper or a silicon baking mat, arrange the bananas as close to one another as possible without letting them touch.

Bake for 2-3 hours or until dried. They will be soft when you remove them from the oven, but will stiffen up a little as they cool. To determine whether they're done, you may want to take one off the sheet  while it's still in the oven and test it by letting it cool to see if it is dried enough for your liking.

Mine cooked longer than I wanted because the plumber was here for an hour and a half and my kitchen is so small that I couldn't get them out of the oven! They turned out great though. The temperature is low enough that they really can't overcook unless you forget about them and leave the house or something.

Store in an airtight container.


Saturday, December 22, 2012

Chewy Molasses Spice Cookies

As promised yesterday, here is a delicious and easy recipe for molasses spice cookies. This was the first time I'd made these cookies in a long time, and after tasting one (or two or three), I couldn't believe I've missed out on eating these every Christmas!

These are the ultimate chewy cookie. The molasses adds the best texture and the spices add great flavor. You don't need a mixer to make this - just melt the butter and stir everything together. So easy! You can make the dough ahead of time, refrigerate it, and bake later.

This recipe came from Got Milk? The Cookie Book and all I changed was adding more salt.

Molasses Spice Cookies

Makes about 2 dozen cookies

1 1/2 sticks salted or unsalted butter, cut into pieces
1/4 cup dark unsulphured molasses
1 tsp vanilla extract
2 cups all-purpose flour
1 cup plus 1/3 cup sugar
2 tsp baking soda
2 tsp ginger
2 tsp cinnamon
1/4 tsp freshly grated nutmeg
1/4 tsp cloves
1/2 tsp salt
1 egg, lightly beaten

In a small or medium saucepan, melt the butter over low heat. Remove from the heat and stir in the molasses and vanilla. Set aside to cool.

In a medium bowl, sift together flour, 1 cup sugar, baking soda, spices, and salt. Whisk to combine.

Add the beaten egg to the cooled butter mixture and mix well with a fork. Using a rubber spatula, fold the flour mixture into the butter mixture. Cover the bowl and refirgerate until firm enough to form balls, about 15 minutes. While dough is in the fridge, preheat the oven to 375 degrees F.

Pour remaining 1/3 cup sugar into small bowl. Scoop out walnut-size pieces of the dough and roll into 1-inch balls. Toss the balls in the sugar to coat completely and place on baking sheet lined with parchment paper or a silicone baking mat, about 2 inches apart.

Bake for 12 to 15 minutes, or until the centers no longer appear raw. For chewier cookies, take them out sooner. For crispy cookies, leave them in longer. Let cool on the baking sheet for about 5 minutes, then transfer to wire racks to cool completely.

These last a long time if they're stored in an airtight container. Serve with a cup of coffee or tea.

Merry Christmas and may you be blessed as you reflect on our Savior's birth!

Friday, December 21, 2012

Snappy or Soft, Gingersnaps are a Christmas Favorite that Deserve a Comeback

My goal this year has been to try new kinds of Christmas cookies. I always make the same spritz and frosted sugar cookies, but I rarely make molasses-based cookies. The other day I made molasses spice cookies (come back tomorrow for recipe) which were soft, chewy, and so amazing! Then, because I had eaten and given them all away, I wanted more cookies so I decided to make gingersnaps. I think this was my first time making them. I think the only real difference is the amount of butter, mixing method, and the spices. Gingersnaps just have ginger and cinnamon, while molasses spice cookies have all the usual Christmas spices - cloves, nutmeg, cinnamon, ginger.

I wanted to make some gingersnaps that were more crispy and some that were softer. I found that it's all about the length of time they're baked. Take them out earlier than you think if you want them to stay soft, and leave them in a little longer for snappier cookies.

These look beautiful to give as gifts. Or serve them for dessert with a cup of tea. I thought it would be easy to eat just one, because they couldn't be nearly as irresistible as chocolate chip cookies, but I was wrong. I had three with my coffee the other morning... oops. Hopefully yours turn out as good as mine did.

Gingersnaps (from The Art of Simple Food by Alice Waters)
1½ teaspoons baking soda
½ teaspoon salt
2 teaspoons ground cinnamon
1½ teaspoons ground ginger
½ teaspoon ground black pepper
11 tablespoons salted butter, at room temperature
2/3 cup sugar
½ teaspoon vanilla extract
¼ cup mild-flavored molasses (sometimes called ‘light’ molasses)
1 large egg, at room temperature
2 cups flour
Coarse (or granulated) sugar crystals for coating the cookies
Stir together the dry ingredients in medium bowl. In the bowl of an electric mixer, beat the butter just until soft and fluffy. Add the sugar and continue to beat until smooth, stopping the mixer to scrape down any butter clinging to the sides of the bowl. Mix in the vanilla, molasses and egg. Mix in the dry ingredients gradually until the dough is smooth.
Divide the dough in two equal portions and place each on its own piece of plastic wrap. Form into logs about 2 inches in diameter. Wrap each in plastic wrap then roll them lightly on the counter to smooth them out. Refrigerate, or better yet, freeze the cookie logs until firm.
To bake, preheat the oven to 350F and line two baking sheets with parchment paper or silicone baking mats. Slice cookie dough into 1/4-inch rounds with a sharp knife. Dip one side and press firmly in a bowl of coarse or granulated sugar, and place sugar-side up on baking sheet, evenly-spaced apart. Leave a couple of inches between cookies since they’ll spread while baking.
Bake for 10-12 minutes, rotating the baking sheets midway during baking, until deep-golden brown. The cookies will puff up a bit while baking, then settle down when they’re done. Bake on the lower end of the range for softer cookies, and more for snappier ones, depending on your oven.
Let the cookies cool two minutes, then remove them with a spatula and transfer them to a cooling rack.
Storage: The dough can be refrigerated for up to five days, or frozen for up to three months. Once baked, the cookies can be kept in an air-tight container for a couple of days but like anything made with butter, of course they’re best the day they’re baked.

Merry Christmas!

Thursday, December 13, 2012

The smell of bread baking: Soft Dinner Rolls

As promised, here is a recipe for rolls - I know in my post A Steamy Bowl of Soup I said they would be whole wheat. Well...I like these better and figured you could try these at Taste of Home if you want some pretty easy and good wheat rolls.

Mine are just plain old white rolls. Soft, tender, and delicious white rolls that are amazing warm from the oven with butter but are also good the next couple days with eggs in the morning or for a little sandwich.

I have another dinner roll recipe I want to share in the future. The recipe for Pops' Rolls, as we now call them, was passed down from my Grandpa "Pops" to my mom, who has made them every year and Thanksgiving and Christmas time. They remind me of the holidays and family and are very good as well. This one I'm sharing right now is faster and an everyday roll recipe (although that would be dangerous to have these around every day).

These rolls are perfect for a weeknight because they can be done in a little over an hour if you need them to be. If I'm having leftovers or soup for dinner, I like making these to go along with it. Something about fresh baked bread is just wonderful - and it makes the house smell amazing. My husband walked in the other evening, smelled the rolls baking, and thought we were having pizza. I wish...these are almost as good.

I got this recipe originally from King Arthur Flour. They have lots of good tested and reviewed recipes and everything I've tried from their site is pretty good. The original recipe is for 24 rolls, which is way to much for me, so I've scaled it down so it makes 9 (well, the picture shows 8 - I had to try them first). These are best served warm with butter, but reheat well if you need to.

Soft Dinner Rolls

3 Tbl lukewarm water
2/3 cup warm milk ( 100 - 110°F)
1 Tbl butter
2 tsp sugar
1 tsp salt
2 1/2 tsp yeast, instant preferred
2 to 2 1/2 cups unbleached all purpose flour


Combine the water, milk, butter, sugar, salt and yeast in a large bowl, or the bowl of your stand mixer. Stir well and let sit for 6 to 8 minutes, or until you see the yeast begin to foam. Add 1 1/2 cups of flour and mix by hand or with the paddle attachment until the dough forms a rough, shaggy mass. The dough will not form a ball at this point, but will be just shy of coming together.
 
Add flour, 1/4 cup at a time and blend with the dough hook until a smooth ball begins to form. Knead by hand for about 10 minutes, or by machine for 4 to 5 minutes until a soft, smooth ball of dough is formed. The dough should feel elastic and slightly tacky to the touch.
 
Lightly spray your work bowl with cooking spray and place the dough in the bowl. Spritz the top of the dough with spray as well and cover lightly with plastic wrap or a shower cap. Let rise for 20 minutes at room temperature or until the dough is full and puffy. Gently deflate the dough, and if you have time, let rise again for about another 20 minutes. If not, move on to the next step.
 
Gently deflate the dough and divide into three equal pieces. Divide each of those pieces into 3 pieces, to make a total of 9 pieces of dough. Shape into round balls by pulling and tucking underneath to leave the top smooth.
 
You can place the rolls into either a 9" square or round baking pan, well greased or lined with parchment paper. After the rolls are in the pan, cover again with your plastic wrap and let rise at room temperature for another 20 to 25 minutes, or until well rounded and full looking. If you are baking now, preheat the oven to 350°F. Bake the rolls for 20 to 25 minutes or until golden brown and an internal thermometer reads 190°F. You can brush the baked rolls with melted butter if desired. Serve warm, store leftovers in a plastic bag for up to 3 days.
 
I've never tried freezing them, but according to King Arthur Flour, if you want to freeze the unbaked buns, place in the pans as described in step 6 and allow to rise for 10 minutes. Wrap airtight and freeze for up to 4 weeks. To bake, thaw overnight in the fridge, then unwrap and bake as directed.


Some of the equipment I used:

Thursday, December 6, 2012

A little nicer than just burlap and plaid

The table before the candles were lit - ignore the white papers on the table
Recently I hosted a table at our Ladies Friendship Christmas Dinner at my church. It is a wonderful event with dinner, Christmas music, the Christmas story, and fellowship. I couldn't wait to decorate my table. I got my inspiration from an outdoor table with a plaid blanket and burlap accessories I had seen on Pinterest.
 

I have to admit, I haven't always been a fan of burlap. I think it can make things look too country bumpkin or the not good kind of crafty. However, when paired with plaid and nice dishes, it looks much more sophisticated. It has a nice warm cabiny feeling, not a cheap I-made-it-myself look.
  
Use a red plaid fabric for a tablecloth, then make burlap place mats (cutting burlap in straight lines and fraying the edges is super easy - go here for a tutorial). The more layers the better, so if you have nice plain chargers like my glass beaded chargers, use them! These were the best wedding gift (from Crate and Barrel but they don't have them anymore), because they're something I wouldn't want to buy now but am so happy I have. Clean white dishes don't add any other distraction to the table.
 
For glassware, simple white mugs and clear goblets with little or no decoration make it not too overdone. I found my goblets at a thrift store for $1 each!
 
 
Here are some fabrics I like. I found mine at Hancock Fabrics, but they don't have the exact fabric online. Any textured red plaid will look great.

Gorgeous stupidly expensive wool fabric from Britex Fabrics

Budget-friendly cotton plaid fabric from Hancock Fabrics

Budget-friendly fleece plaid fabric from Hancock Fabrics
 
For the dinner, I had to give out favors. I wanted to bake something but didn't know how to present it. I decided to use mason jars for favors (bought at Fred Meyer). I baked Cowboy Cookies (recipe to be posted soon...) and put 3-4 of them in a jar. I wrapped it with this burlap-like fabric I had found at Hobby Lobby, hot gluing it in place. Then I finished it off with a bow of red-and-white twine.


Monday, December 3, 2012

A pretty package does make a difference: Glazed Pumpkin Scones

Pumpkin scones packages in paper treat bags
Your parents and teachers probably told you "don't judge a book by its cover" and "it's what's on the inside that counts," and I entirely agree. When I cook and bake, I care more about taste than looks. I've eaten many things before that look amazing but don't taste like it. And I've made many things that I don't post on my blog because they don't look too appetizing.

However, when I'm making treats for other people, I want them to look nice. One issue I always have is how to package things. I don't like Tupperware and plastic bags often make baked goods take on a plastic-y taste.


from Hobby Lobby in the Christmas section


I found one solution when I was at Hobby Lobby - paper treat bags. These happened to have a red and white Christmasy pattern on them, but I hope to find them in just plain white or brown as well. I had never seen bags in this size - they are similar to the bags you get at a coffee shop when you buy a pastry, just a little smaller. I liked these better than bigger bags, because often I just want to bring someone a cookie or two. Perfect!

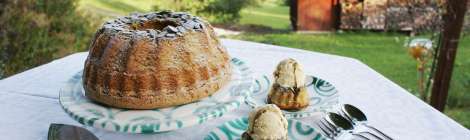
The recipe I had been wanting to try is a copycat-ish recipe for Starbucks' pumpkin scones. I like the idea of a glazed pumpkin scone, but every time I get one, I am disappointed at how overly sweet and too dry it is. This time of year, I always have pumpkin puree in the pantry, and today I actually had some in the fridge leftover from making a pumpkin pie. After trying pumpkin pancakes last week (so good!), I thought I'd use the rest for some pumpkin scones.

They were delicious and just how I'd wanted them to be, even though I used milk instead of cream or half and half. I like them cool and with the glaze, but also warm from the oven with no glaze and just a little butter. Just right with a cup of tea or coffee!

Glazed Pumpkin Scones 
If you prefer a little less sweet pastries, don't make the glaze and serve warm from the oven with butter.
Makes 12 scones
 
for Pumpkin Scones:
2 cups all-purpose flour
1/3 cup brown sugar
1 teaspoon baking powder
1/2 teaspoon baking soda
1 teaspoon salt
1 teaspoon ground cinnamon
3/4 teaspoon ground ginger
1/2 teaspoon ground cloves
1/2 teaspoon ground nutmeg
1/2 cup cold unsalted butter, cut into cubes
1/2 cup pumpkin puree
1 tablespoon unsulphured molasses
3 tablespoons half and half or cream (they also work with regular milk - not nonfat)
1 egg
2 teaspoons vanilla
 
for Simple Sugar Glaze:
1 cup (125 grams) powdered sugar, sifted
1 to 2 tablespoons half and half
 
for Spiced Glaze:
1 cup (125 grams) powdered sugar, sifted
1 tablespoon pumpkin puree
1/8 teaspoon each cloves, nutmeg, ginger and cinnamon
1 to 2 tablespoons half and half
Heat oven to 400 degrees F and line a large baking sheet or two small baking sheets with parchment paper.
 
In a large bowl, whisk the flour, brown sugar, baking powder, baking soda, salt and all the spices together. Cut the butter into the flour mixture until the mixture looks like coarse cornmeal. (You could also use a food processor for this – if using, add flour mixture to bowl of a food processor then add the cold butter cubes. Pulse 10 to 12 times until the mixture looks like coarse cornmeal or crumbs).
 
In another medium bowl, whisk together the pumpkin puree, molasses, half and half, vanilla extract and egg until blended. Stir pumpkin mixture into flour and butter mixture with a spoon just until a soft dough forms.
 
Transfer the dough to a floured surface then knead it three to four times until it comes together. Then, divide the dough in half and pat into two circles, about 6-8 inches in diameter. Use a knife or pizza cutter (pizza cutter works best) to cut the circles in half, then each half in thirds (making 6 wedges from each circle).
 
Transfer scones to the prepared baking sheet(s) and bake 10 to 15 minutes or until golden brown. Transfer to a wire rack to cool completely.
 
Once scones have cooled, make the glazes. To make the simple sugar glaze, add sifted powdered sugar to a bowl wide enough to dip the scones in. Add one tablespoon of half and half. Stir, then judge the consistency. If when you pick a spoon up and out of the glaze it slowly drizzles back into the glaze, it is fine. If it is too thick, add a little more half and half (a little goes a long way, here). If it is too thin, add a little more powdered sugar. Dip each cooled scone directly into the glaze then place glazed side up back onto the cooling rack.
 
Next, make the pumpkin spiced glaze. Combine sifted powdered sugar, pumpkin puree, spices, and then add one tablespoon of half and half. Stir and check consistency. Adjust the same way as you would the simple glaze. Use a spoon to drizzle a zig-zag pattern across each scone.
 
Wait about 15 minutes until the glaze has set then enjoy.


Sunday, November 25, 2012

Tomato cage Christmas tree


At the end of the summer, after we've gotten our 5ish tomatoes from our usually pathetic looking tomato plant, the tomato cage just sits on the deck for the rest of the year. Until now... thanks to Pinterest, I now have a free lit Christmas "tree" on my deck! Just turn the tomato cage upside down, bend the ends together to make a point, and wrap white lights around it. It's as simple as that!

Excited that Christmas is approaching...


Tuesday, November 20, 2012

Simple Thanksgiving table decor

Thanksgiving is such a wonderful time of year that we often rush through because we look forward to Christmas decorating and shopping. I have to admit, I am guilty of that. I look forward to Christmas so much and just cannot wait for the day after Thanksgiving so I can decorate and listen to Christmas music (although I usually cheat on the Christmas music). However, Thanksgiving is such an important day. Although we have so much to be thankful for all throughout the year, it is good for us to take a day to remember how truly blessed we are. That is what I want to teach my son to do!

Since Thanksgiving is focused around the dinner table, I thought I would share with you some of my favorite simple table decorations. I like using natural elements, such as flowers, pumpkins, or twigs in containers that I have around the house or that I've found at thrift stores. These don't require a lot of money or time, but will make your table a little more special.

Happy Thanksgiving!

Fall-colored flowers in rectangular vase (from Houzz)
 
 
A ceramic utensil holder holds fresh autumn-colored flowers and large wooden spools from Etsy hold fall leaves (from Country Living).


Orange fruits and vegetables in a simple white footed bowl (from Martha Stewart)


Simple and classic Thanksgiving centerpiece 12 Unique Thanksgiving Decoration Ideas
Mini pumpkins and leaves on a cake pedestal (from the Pioneer Woman)


Wrap leaves around potted plants and place in small glass vases


pumpkin table runner bhg
Make a table runner out of small pumpkins, ribbon, and real or faux berries (from Better Homes and Gardens)


And when the day after Thanksgiving does roll around and you're feeling full of turkey and tired, stay home and go shopping online instead!

Sunday, November 11, 2012

Weeknight bacon-wrapped chicken


We rarely have boneless skinless chicken breasts in our house because they usually end up dry and flavorless when you cook them. I prefer the chicken tenders because they're still white meat but stay really moist. However, these boring but healthy pieces of chicken ended up in my fridge after my brave attempt to piece out a whole chicken. I used the dark meat parts to make a chicken butternut squash stew and the white meat I decided to save for another use. I was trying to think about how to add flavor and moisture without adding dairy. Hmmm... what is flavorful, fatty, and amazing. I know you're all thinking what I'm thinking...bacon! We just discovered that we love the Farmland thick cut bacon (thanks to the grocery store for having it on sale for the last few weeks). I had a few pieces left and knew it would be a match made in heaven. We also happened to have some thyme, which goes great with chicken.

I searched around online for some ideas of how to cook both the bacon and the chicken without overcooking either, and I got this idea from a recipe I found at Food and Wine. Theirs is a little more fancy, using the chicken liver and all, but I wanted to come up with something that is quick enough and simple enough to make on a weeknight.

This recipe has only 3 ingredients (not including salt and pepper)... I should send it to Claire Robinson! The chicken is moist, the bacon adds the much needed salt and fat, and the thyme adds the flavor. I will definitely make this again if I have chicken breasts laying around at some point.

Bacon-Wrapped Chicken
(adapted from Food and Wine)

Serves 4

2 large boneless, skinless chicken breasts, each one cut in half
2-4 thyme sprigs
8 slices of thick cut bacon (I like Farmland)
Salt and pepper

Preheat the oven to 400°. Season the chicken with salt and pepper. Remove the thyme leaves from the sprig. Place a small amound on each chicken half-breast. Wrap each piece of chicken in 2 slices of bacon; secure the bacon with toothpicks.

Heat a large, ovenproof skillet. Add the chicken and cook over moderately high heat until the bacon is browned, 5 minutes. Turn the chicken, cook for about a minute on the stove, then place the entire pan in the oven. Roast in the oven for 10-12 minutes, or until cooked through (internal temp of 180°). Remove the pan from the oven and spoon the bacon grease over the chicken a few times. Cover with foil and let rest for 5 minutes.

Remove the toothpicks and serve. It's delicious with roasted potatoes or sweet potates and a green salad or cooked green veg.


Friday, November 2, 2012

The cake that decorates itself! Applesauce Spice Bundt Cake

Anytime Gourmet: Applesauce Spice Cake
Something about a bundt cake makes me happy. I think because you can take a plain old basic cake and make it look fancy. Or because it reminds me of Germany, where I studied abroad for a year and where my last name comes from. Or maybe it makes me think of the 50s houswife and her cooking in a fancy dress and apron. I had never owned a bundt cake pan until last year, when I found one at a thrift store. I think this is only the second or third time I've used it, but I plan on trying more bundt cake recipes (not while wearing a dress, of course).

Food historians generally credit H. David Dalquist of Nordic Ware for creating the first aluminum pan called "bundt" in 1950. The name bundt came from the German Bundkuchen, a ring-shaped teatime cake (bund is pronounced like there's a "t" on the end). They had different designs, but always ring-shaped:
Photo credit: The Charmed Cupcake
Photo credit: Wikipedia

After Otto was born, we received meals from many generous friends, colleagues, and families from the school where I taught. One of these meals from a wonderful family included a freshly made applesauce cake. Since I hadn't been baking, I was craving some delicious, homemade baked treat. This hit the spot and I've wanted to make it since.

I knew it was the perfect opportunity to make this delicious cake when my mom made applesauce with freshly picked, sweet and juicy apples. I changed a few things in the recipe, but in general, it stayed intact.

This cake has only ½ cup of oil and no butter. I couldn't believe it, but it doesn't need butter! The applesauce keeps it moist, and the spices and salt add the flavor.

The first time I made this cake I didn't put the glaze on early enough and it didn't seep into the cake like it was supposed to. It's important to put the glaze on as soon as you take the cake out of the pan while it's still very warm. And yes, it does help to poke the cake first with a fork before pouring on the glaze. I even scooped up some of the glaze that fell off the cake with a spoon and poured it back on - no wasting here!

This cake is not too sweet, and not too spicy. I decreased the amount of spices because they can be overpowering, but you can always add more if that's what you like. It can be served in the morning with coffee or in the evening for dessert. I've been eating it at both times of the day!

 
Applesauce Spice Bundt Cake

Cake

½ cup canola oil
1 egg
½ cup sugar
½ cup brown sugar
1 tsp vanilla
2 cups unbleached flour
2 tsp. baking powder
½ tsp. baking soda
1 tsp. salt
1 tsp. cinnamon
½ tsp. nutmeg (preferably freshly grated)
½ tsp. cloves
¼ tsp. cardamom (optional)
1½ cups applesauce (preferably homemade)

Glaze


1 cup powdered sugar
1 Tbl softened butter
2-3 Tbl milk (at least 1 percent milk)
½ tsp cinnamon
Pinch salt
 
Preheat 350 degree oven; butter and flour a bundt pan.

Combine all of the cake ingredients in the order listed. Pour into pan and bake for 40-45 minutes or until cake springs back when gently pressed.

Cool on a rack for 10-15 minutes before loosening and inverting onto the rack (with foil below).

While cake is cooling in the pan, whisk softened butter, powdered sugar, milk, vanilla, and pinch salt well until smooth.

Take a fork and gently spear around the cake in various places so that the glaze will seep into the cake. Spread glaze on the cake while it is still warm!


Sunday, October 28, 2012

Sunday night braised beef

Chanterelle mushrooms are on sale this week at our local Metropolitan Market. $8.99/lb doesn't sound like much of a sale, but when the regular price is $20/lb, 9 bucks a pound is a screaming deal! We saw them and new we needed to make a Sunday dinner with them.

Since our son was born, we haven't been keeping up with our Sunday dinner tradition, but now that he is sleeping through the night (I hope I didn't just jinx it), we have a little more energy to make big meals on the weekend. This is usually when my husband cooks because he likes to make these long slow-cooked meals that we have time for on Sunday. I don't usually have the patience for it, but I love the outcome.

Chuck roast was also on sale this week, so we thought it would be perfect with the mushrooms in some sort of Dutch oven, cooks all day, braised beef dish. My husband should really get the credit for this one because he always has these ideas. So if you try it and don't like it, you can't blame it on me. But really, what's not to like about beef that's falling apart cooked in a rich stock with yummy wine-and-stock-soaked vegetables. Yum, I'm getting hungry again just thinking about it!

The pinkish, tan colored things are potatoes that have soaked up all of the yummy sauce!
Braised Beef with Vegetables
(Serves 4-6)

If you can't get (or can't afford) chanterelle mushrooms, use creminis.

This is delicious with a bright green vegetable on the side, such as a fresh green salad or steamed green beans.


For the stew:
1 Tbl vegetable oil
2 lb beef chuck roast
3 russet potatoes, peeled and cut into 3/4-in pieces
5 medium carrots, cut into 1/2-in pieces
2 stalks celery, cut into 1/2-in pieces
1 onion, sliced into 1/4-in slices
4 oz chanterelle mushrooms
1/2 head cabbage, sliced into 1/4-in slices
3 medium cloves garlic, thinly sliced
1/3 bottle red wine (we used 2 buck chuck from TJs!)
1 cup beef or chicken stock
2 small sprigs rosemary
1 tsp died thyme
Salt and pepper

For the sauce:
2 Tbl butter
1 Tbl cup flour
3/4 cup chicken or beef stock
Splash of red wine
2 oz chanterelle mushrooms
Salt and pepper

Preheat oven to 325. In a large Dutch oven, heat the oil over medium-high heat until shimmering. Generously salt and pepper the beef. Brown the beef on all sides. Remove from the pan. Add vegetables and garlic to the pan, seasoning generously with salt and pepper. Cook for about a minute to get some color on them.

Add wine, chicken stock, and herbs. Place the beef back into the pot, submerging it into the liquid as much as possible. The liquid should be 1-1.5 inches up from the bottom of the pan. Place the lid on and put in the oven for about 4 hours until the beef easily comes apart with a fork.

Remove beef and vegetables to a platter. Put the Dutch oven back on the stove over medium heat. Pour in the stock and wine and scrape up any bits on the bottom of the pan. Remove to a bowl. Add mushrooms to the pot and cook for about 5 minutes. Meanwhile, on a plate, mash the butter and flour together to form a paste. This will thicken your sauce. Add liquid and flour/butter mixture to pot and cook, stirring, until sauce is thickened. Check for seasonings and add salt and pepper if necessary.

Pour sauce over beef and serve.

Monday, October 22, 2012

A Steamy Bowl of Soup

(Not steamy in that way... steamy as in so hot it's almost boiling and would burn most people's mouths. I guess steaming is a better word? Oh well, steamy is what came to mind.)

The weather is changing, the leaves are falling, and all I want to do is have a fire, eat some soup and a freshly-baked roll. Not just any soup. It has to be homemade, very hot, and preferably a day old. Soup always seems to get better after a day or two of sitting in the fridge. Here are some of my favorite soup recipes from around the web. I'll be posting a simple whole wheat roll recipe in the near future... check back soon!

Barefoot Contessa's Lentil Sausage Soup - I just made this with regular old lentils that you can buy at the grocery store and it turned out great! I'm sure using the French lentils she calls for would make it even better!

Photo courtesy: Quentin Bacon


The Joy of Cooking's Split Pea Soup (as seen here by The Delicious Life) - a classic that is so comforting and easy to make, especially if you have a ham bone or bacon left over.


Photo courtesy: The Delicious Life (www.thedeliciouslife.com)


Smitten Kitchen's French Onion Soup - cheap (besides the swiss cheese) and perfect when you have leftover bread and too many onions to use up.

Photo courtest: www.smittenkitchen.com


Another delicious recipe I want to share soon is my father-in-law's clam chowder. Mmm... my mouth is watering just thinking about it.

Have a soup recipe to share? Email me at anytimegourmet@gmail.com


Saturday, October 13, 2012

A baby changes everything

Otto Constantino - 8 weeks

A baby does change everything - trips to the grocery store, my diet, the amount of laundry we do in a week, how much sleep we think is "good", the amount of time and money I spend on myself, and even his own room. I had set up Otto's room with some limitations such as my budget and the fact that we are renting our place. Once he was born, a few things changed, and now I know what I will do next time I design a nursery.

A few things I changed:

1. I put a table next to the rocking chair for water, books, etc. I know this sounds obvious, and I did think about it before he was born, but I couldn't find a table I liked. I still don't have a table I like, but it doesn't matter - any table will work. I want to find a bookshelf/side table or I might just build one myself if I can't find one.

2. I put the elephant mobile above Otto's crib. Now that he's sleeping in his crib, I thought it would be nice for him to have something to look at when he wakes up. And I never really liked how it looked above the rocking chair - too busy or something.

3. I hung the "Otto" frame by the door instead of the chalkboard. My friend made me the "Otto" frame with pictures, and I just love it, so I wanted it to be where everyone could see it.

4. I put hooks below the Otto frame for his sweatshirts and jackets. You wouldn't think a baby would have so many hoodies, but he has lots of hand-me-downs from his sporty cousin, so we have ended up with a lot of sweatshirts. I used cup hooks (see link at bottom), which are super cheap (I bought mine at Target), and you don't need any tools to put them up. I just twisted them directly into the wall. Technically, you're supposed to pre-drill holes, but I have used these hooks many times without doing so. They can hold up to 5 pounds each, which is more than enough for hanging jackets and sweatshirts!

5. I always have a receiving blanket on top of the changing pad cover. The first few weeks, Otto liked going to the bathroom as soon as his diaper was off, so we were washing the changing pad cover every other day or something (I can't remember that long ago.). Now, I just use one of my flannel receiving blankets so that if he has an accident, I can just wash that. You could also just buy fabric from the fabric store, but since I had these cute receiving blankets I wasn't using for anything, I thought they would be perfect.


Cup hooks instead of a coat rack - so cheap and easy to install!

Mobile above his crib.


Ugly table from outside that I'm using for next to the rocking chair.. for now, at least.


Receiving blanket on top of the changing pad cover so it can be changed easily.


3 months